Home Appliance Diy
Hotpoint Indesit dryer themostats
 |
UNPLUG FROM MAINS. Remove 2 screws from lid (shown in picture.) |
| Push lid ( as shown in diagram ) until it moves back then lift lid.It can be very tight and can need a hard push. |
 |
 |
Remove the four screws as shown in the picture to the left. |
| Remove the two screws at the top of the side panel as shown in picture below. |
 |
 |
Remove the plynth by inserting a small flat bladed screwdriver in the 3 places as shown in the picture and slightly lift up to release the 3 clips (one at a time ) then the plynth can be released from the lower clips (The lower clips can be tight and soon break). |
| Remove the 2 screws as shown in the picture ( some of the models have a screw underneath shown by the arrow).The side panel slides back and can be removed . |
 |
 |
The insides can now be seen .Unplug the heater plug as shown in the picture . Remove any tie wraps towards the rear of the machine. |
| Remove the screws from the heater cover (There are 2 small screws where the yellow circles are these hold the heater in place
DO NOT RELEASE YET . Then using a flat bladed driver prise the cover away from the rear panel to remove the heater cover and heater (mind the heater |
 |
 |
The heater cover should look like this. |
Remove the two screws and release the plastic clip and the heater should come out
THE HEATER IS VERY FRAGILE. |
 |
 |
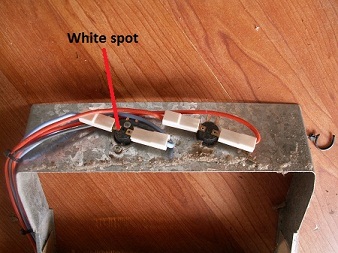
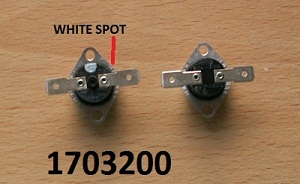
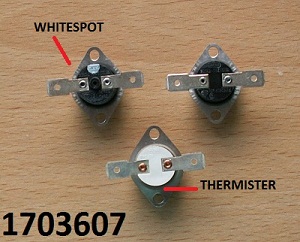
The thermostats,are shown in the picture and can be released by removing the screws. Please take note of the white spot .The second thermostat has got a yellow spot on later types. The thermostats should be closed circuit. |
| 1703200. |
 |
 |
1703607. |
| 1703608. |
 |
 |
The thermostats can be replaced. And refitted in reverse of the above . |
If you cannot find what you are looking for or need help then just drop me a message at Appdiy@yahoo.co.uk.


