Home Appliance Diy
Hotpoint Indesit condenser dryer belt
 |
This is how i did it.
I ALWAYS UNPLUG FROM MAINS.
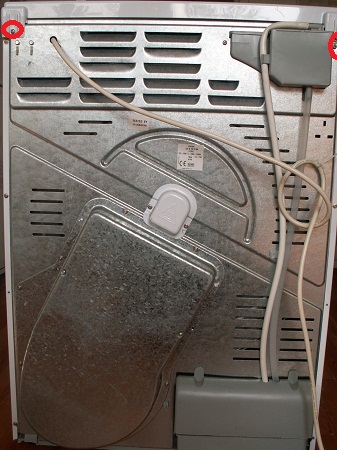
I removed the 2 screws from the lid (shown in picture). |
| I pushed lid ( as shown in diagram ) until it moves back then lift lid.It can be very tight and can need a hard push. |
 |
 |
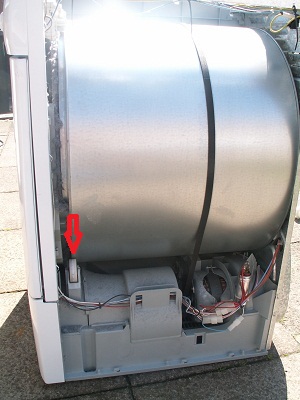
I removed the six screws as shown in the picture.The shaft cover will come off when the two screws in the middle are removed .Then i removed the screw at the top of the side panel ( near the front ). |
| The side panel will slide to the rear of the machine then lift up to remove.Both side panels need to be removed. |
 |
 |
I removed the rear shaft cover |
| I removed the pin so the coller can be removed. |
 |
 |
This is the teardrop type of bearing.Some have the square type. |
| I uncliped the wires from the fan housing and place a small screwdriver ,as shown in picture,the raise up to release cover |
 |
 |
used pliers to release the clip in the center of the fan. The fan can then slide off the shaft . When i pulled the belt to the side towards the front ,and turn the drum ,the belt came off the pulley and could be slid off the motor shaft.
|
| I hammered in the front bearing making sure it was right in because space is needed to fit the front seal |
 |
 |
I Pulled the return hose off, the lower hose circle and Removed the top hose , then i turned the top of the hose 90 degrees so its coming out from the rear of the machine and it pulled out ,see below. |
| Here it is with the hose removed. |
 |
 |
Out came the water bottle and remove the two screws, shown in picture . The bottle slide can now be removed . |
|
The new belt can be fitted by pulling the drum and the back apart slightly.The new belt can be slid over the back.I had to mind the rear seal.The other way is to remove the drum completely as described in `fitting a v4 kit`. |
 |
 |
On re-assembly i may have to remove the 3 screws at the front to re-align the drum with the front. |
| When it is reassembled to this stage the belt will be loose as shown.Make sure the other side panel is on and the pin is fitted in the rear shaft and the cooling fan blade hasn`t been fitted. |
 |
 |
I unpluged the heater plug and remove any to wraps from the wiring. |
|
From the rear i removed the heater screws . Removed the heater cover and put in a safe place as they damage easily. |
 |
 |
Remove the fan blade.Once the spring clip has been removed the blade should pull off. |
| The trick is to remove the 4 screws (here`s 2 of them) and the motor is released.Turn the motor to get the belt aroud the pulley.Line the belt up on the drum. |
 |
 |
Get a screwdriver. etc anything inbetween the screws and lever the motor towards me from the top to take the tension up on the belt and line the holes up in the motor to put the screws back in (it`s better with 2 poeple but it can be done on your own).Then replace all the other parts. |
If you cannot find what you are looking for or need help then just drop me a message at Appdiy@yahoo.co.uk.


